06 August 2012

How to..remote others PC effectively (with permissions)

Hi all,

I'm here again to guide about new software..err basically not new, but some may not experienced using it.lol! So, let me show you, a full image guide to remote control others PC. But first you must download the software, TeamViewer in here. The I will guide start from installation. Here we go:

Image 1.1
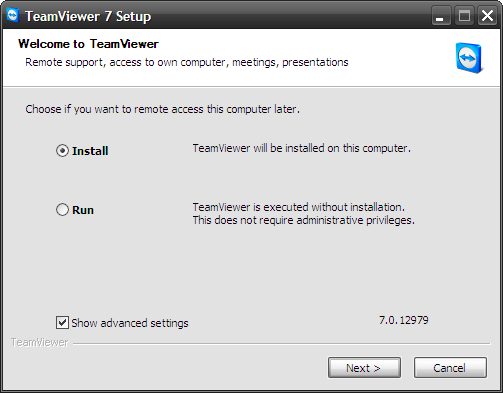
Image 1.1 :- After you double click the installer, this will appear. Let the round button on "Install" and tick on "Show advanced settings". Click Next button

Image 1.2
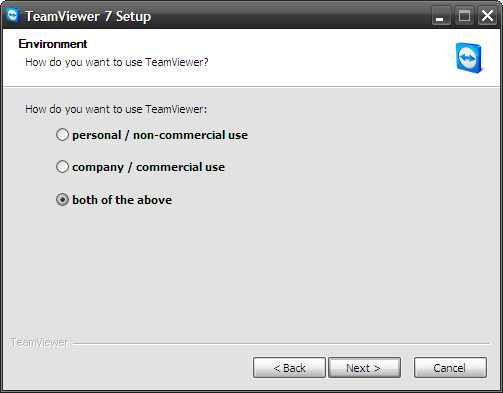
Image 1.2 :- Click on "Both of the above" and Next

Image 1.3
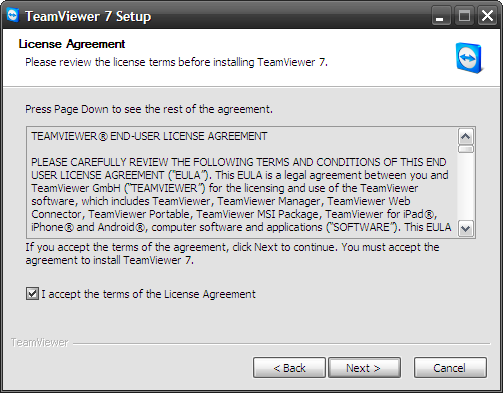
Image 1.3 :- Tick on "I accept the terms of the License Agreement" and Next

Image 1.4
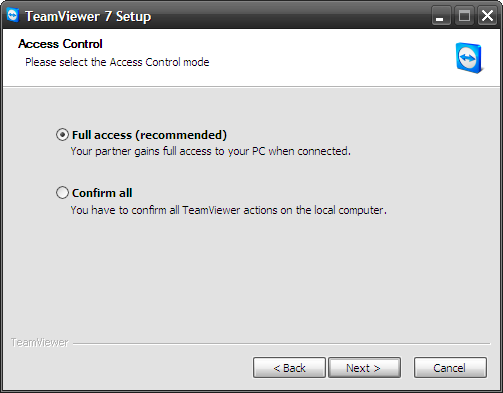
Image 1.4 :- Let it as "Full access (recommended)" and Next

Image 1.5
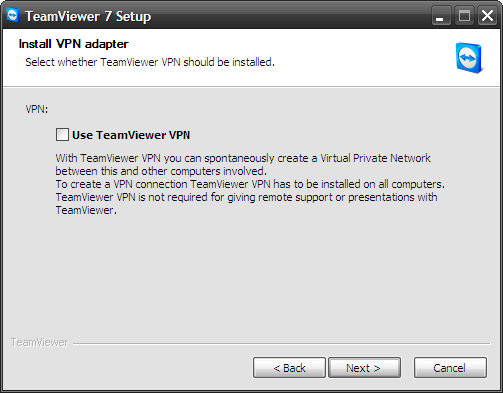
Image 1.5 :- Do nothing on this window. Just click Next...Next...Next until it start to install and gone

Image 1.6
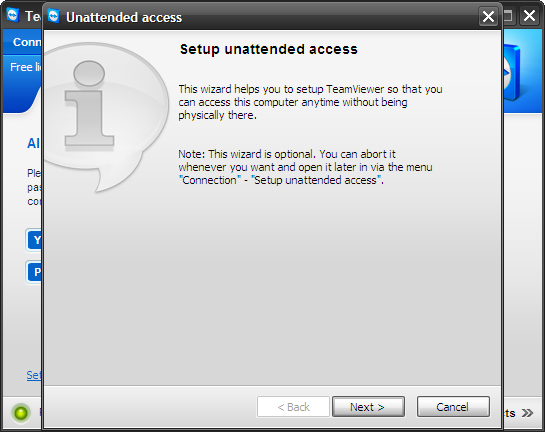
Image 1.6 :- This window will appear after you finish installing from image 1.5, which means you will start to set your PC to be easily remoted by others PC. Click on Next

Image 1.7
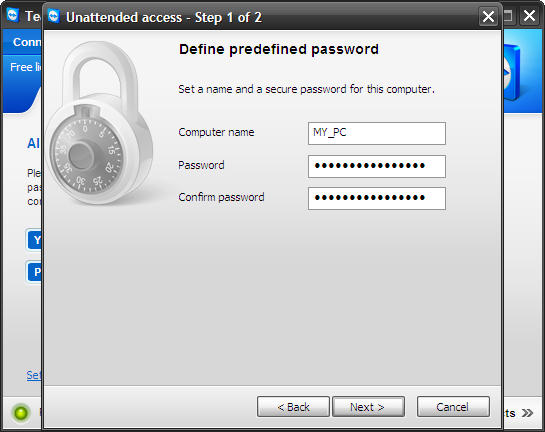
Image 1.7 :- On this window, set your computer name and password. Which mean, from this anyone who want to remote your PC will enter your ID (show later) and need to key-in the password you enter here. Assume that this will be your personal password.

Image 1.8
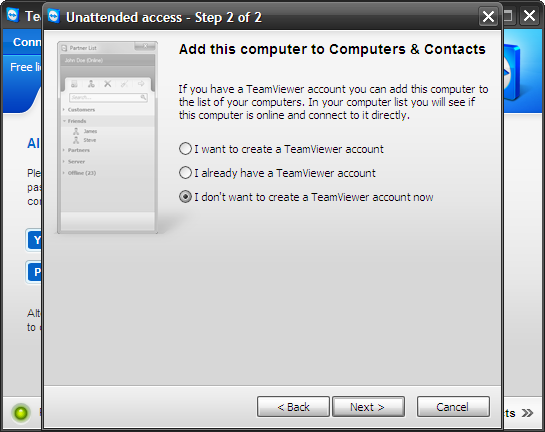
Image 1.8 :- This window will offer you to create an account or login to your account (if have one) to stay connected to other partnet who on the list (assume your colleagues). For me, I recommend not to choose to create account. Click on Next

Image 1.9
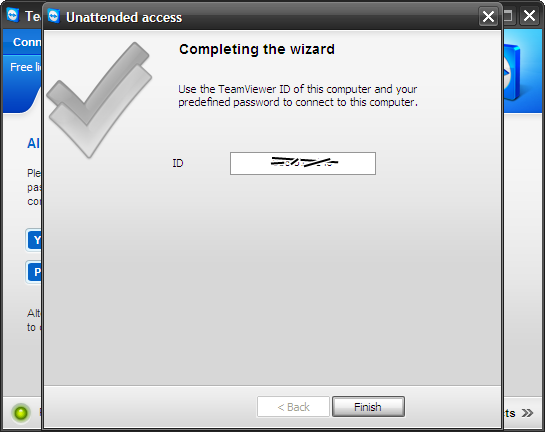
 Image 1.9 :- Here are the ID which generate for your PC which I tell you on previous image 1.7 details. Click on "Finish"

Image 1.10
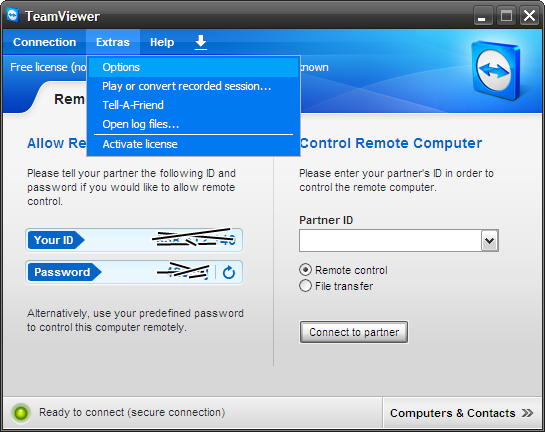
 Image 1.10 :- This is the main window of TeamViewer when you double click the shortcut icon on desktop. If you want to do settings first, click "Extras" and select "Options"

Image 1.11
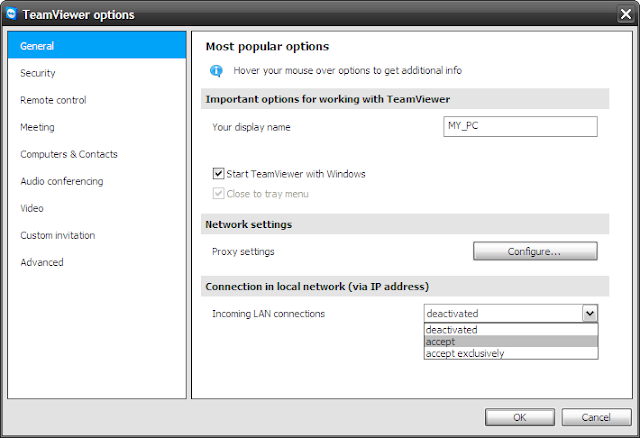
Image 1.11 :- General tab. If you want to enabled partner connect to you, on "Incoming LAN connections" select "accept"

Image 1.12
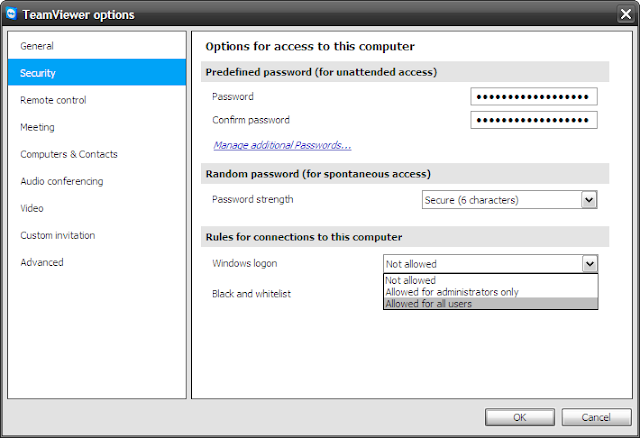
Image 1.12 :- Security tab. If you want to allow user to remote even when you at logon screen, select "Allowed for all users" or "Allowed for adminstrators only". This will allow you to enter the username and password of remote PC before able to full access it. After that, click OK, close the TeamViewer and open it again to use the new settings.

Image 1.13
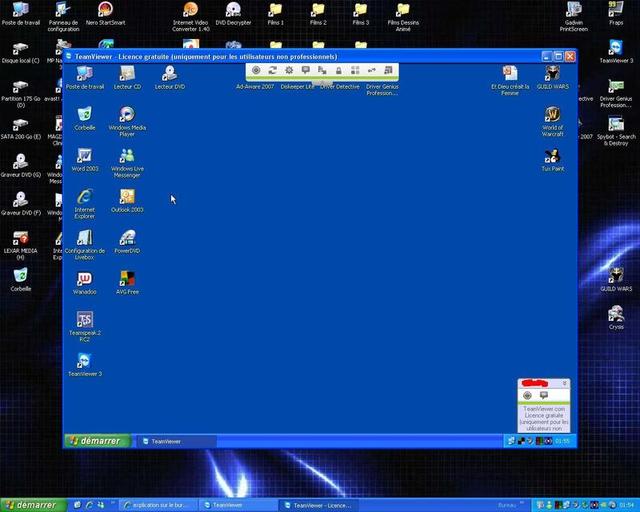
Image 1.13 :- This is the example of remote image I retrieve from Google which to show you the result after you key in the partner ID and password. You can access the others PC same as you do to current PC


Notes:
If you don't want people easily accessing your PC, you must not show your personel password as on image 1.7 even though you know you may change it back to new one. Give them the password on image 1.10..see the column Your ID and Password. On password, you may see the the circle blue arrow after the password. You may click on it and select "Create new random password" where the new password will be generated for those who want to connect with you.


Right now, I'm using TeamViewer to see my PC's activity at home from office, so I use the password that I create on image 1.7. This software is commonly use to connect with long distance communication. I suggest this software to be used. Effective and easy..tq


25 July 2012

How to.. download driver for PC (mainly)

Hi all,

After you formatting a PC, they won't have a driver actually which is lack of graphic interface, no sound and importantly, you can't operate your PC smoothly. Most of this appear when formatting using Windows XP and Windows Vista operating system compare to Windows 7 which on installation of windows, it will install the basic driver for all eg: Network, Sound and Graphic.

Even though, you must download the proper driver..how?? Let me guide you through this. By using CPUID or CPUZ which this software display the details of hardware install in the PC eg: motherboard model, RAM size and type, processor type and so on. Download this software here, it's free.

Install the software, find the shortcut on desktop and run it..

CPUZ Main App


On the displayed, click on Mainboard tab and find the Manufacturer and Model..so what you need is type those two + driver on you browser search engine eg: "HP 3607 driver for XP" or "HP 3607 driver for Vista" or "HP 3607 driver forWindows 7"..

I'm sure you will find the right driver for your PC..good luck

24 July 2012

How to.. speed up BitComet download

Hi all,

Do you use torrent downloader to download torrent file? Ahhh, for those who not discover it yet let me show you how to speed up BitComet. But first, all you need is an account which is you must register the account and sign in to BitComet account. The more file you downloaded, the more you will get the priority for download it.

Also make sure your connection light turn green which is not the yellow light. Because from what I understand, the yellow light means that you have a limited access for download speed. If you have an internet modem or router, first you must register your IP address to it.

The way you want to find your IP address use for internet is by use "Run" on Start Menu or press Windows logo + R and type on it "cmd". Click OK then a command prompt window will appear. Type "ipconfig" and Enter. Find the IPv4 and there should be your IP address using to interact with your modem or router.

After you've done all that, download this software named Cheat Engine from here. This cheat engine will be used to boost download speed. Then, we can start speed up BitComet download..

The image below show the download speed if I don't use the cheat engine. By the way, it should be less than what it appear if I don't have an account. The BitComet account usage will give u a title for how many you've download. For me, I score 18058 which means now I'm in Lieutenant Colonel title and I've got this after I download using BitComet for 5 years I guest..lol!

Image 1.1
You see the speed right? I'm using 1MBps internet speed. Ok, after you've done downloading the cheat engine, install it on your computer. Then run the cheat engine. When you run it, a button represent computer icon will blinking. Click on it.

Image 1.2


Images 1.3
Select BitComet.exe

Image 1.4
In value field, insert "X8" (refer image 1.4) and then click "First Scan" button

Image 1.5

 See image 1.5, on "Scan type", select "increase value by..."

Image 1.6
See image 1.6, tick on "at least xx%", "Enable Speedhack". On speed field, insert 0.1 and click Apply

Image below show the increasing of download speed. I've use this software about a years ago and I feel satisfy. You should try it

Click to enlarge
See the wave graph shows it increasing speed. Enormous speed for me

Click to enlarge
But before you start download the torrent file, it needs for you to see the Seed count must be at least a number than zero. On every torrent file, it will show healthy, seed, leech or whatever right? Choose the most highest seed. So you will get more speed.

Any suggestion or amend for my guide here, it is pleased to do..thank you

23 July 2012

How to.. resize windows taskbar to fit icon image only (Win7 & Vista)

Hi all,

We have a new guide here. A guide on how to resizing your taskbar icon to fit on it's images only..

See the picture below, it's common for windows user default setting where the taskbar icon is grouping into one type let's say, for windows explorer, mozilla firefox or internet explorer. If you open more than one of these task, it will grouping as one type. Right?

Images 1.1
So the first thing to do is right click on taskbar and select properties

Images 1.2
A properties will appear, at taskbar buttons select "Never combine"..see image below. Click Apply and OK

Images 1.3
And the result, you will see like image below

Images 1.4
When it's not grouping, you will see all things that you open with it labels. So now you go to Start --> Run or simply press Windows logo + R for shortcut

Images 1.5
Type "regedit" which means Registry Editor

Images 1.6
This is the registry editor. Expand the selected tree HKEY_CURRENT_USER --> Control Panel --> Desktop --> WindowMetrics. Make sure this windows will appear. Right click on empty white side so it will display "New" and select "String Value"..

Images 1.7
Then you must enter the name of that string to "MinWidth". After that, right click on that string and select "Modify" or press Enter so a new window will appear for Edit String. At the "Value data" section, enter 54 which mean the width of taskbar is 54. Then click OK

So the data should appear as below:

Images 1.8
After you finish all this, close all window. Try to Logoff and Logon back windows. The result is as below:

Images 1.9
Try to open My Computer, My Music, My Documents or anything else. You will see the taskbar will fits to its icon. For me, it's quite comfortable than using grouping because it take time to select which window you want. Have a try on this.. Hope you like it..

Ah..before I forget, for Windows XP users, you also can try do this but the icon is not fit to icon image. I've try for XP, the width value I use is 10 or 30 I forgot and that's the best I get. If you have any commented, please stated.

See yaa..

20 July 2012

How to.. send executable or compression attachment using email

Hi all,

Today I'm gonna guide you on how to send an attachment using email and the attachment that you want to send is in *.exe format or any executable file such as *.bat, .dos or whatsoever.

These email unable to send your attachment because it prevents any executable file to be send which including compression file (*.rar / *.zip). The way you want to overcome this situation is by renaming the file you want to send, without any extension. Which is start from ".exe" or ".rar" for example except for documents file eg: Microsoft Office blaaa3..

Here I provide you some illustrate images so you can see the process.

Images 1.1


See images 1.1 above.. I've prepared a file to be send which the file type is WinRAR archieve ("FileToUpload.rar"). For those who do not have the extension appear at the end of the filename, please untick on box in Folder options.

For Windows XP user, click on "Tools --> Options". Go to "View" tab and search for "Hide extensions for known file types". For Windows Vista & 7 users, click on "Organize --> Folder search and options". Go to "View" tab and search for "Hide extensions for known file types".

 **** After you untick the box, click Apply & OK button. You will see the file with extension at the end of name

Right click on file and select "Rename" or simply click on file and press F2 on your keyboard..
The original file is "FileToUpload.rar" and you rename it without extension so it will become "FileToUpload"

Images 1.2
This image 1.2 shown the warning from windows which reminds you that the file you rename without an extension may become usable...but don't mind of it. Just click Yes button..

Images 1.3
See the images above which the result of renaming it without extension. The file become unidentified by windows. You may apply this to *.exe like I brief before.. So, after you complete doing this, write an email to your friend or colleague and attach with this file. And I believe the email will be able to send it.

But remember to notify the receiver to download or save the attachment with extensions that same as the originality from your PC..